1: Phone Calls
Contents:
- The difference between dialing and calling
- Sending an intent with a phone number to dial
- Making a call from within your app
- Using emulators to test phone calls
- Related practical
- Learn more
Android mobile devices with telephone/cellular service are supplied with a Phone app for making calls, which includes a dialer for dialing a phone number. This chapter describes the Android telephony features you can use from within your app by launching the Phone app with an implicit intent. You can add code to your app to:
- Dial: Launch the Phone app's dialer with a phone number to dial a call. This is the preferred technique for apps that don't need to monitor the phone's state.
- Call: Request the user's permission if necessary, and make a phone call from within the app, with the ability to monitor the phone's state. This technique keeps the user within your app, without having to navigate back to the app. It also enables phone calls if the Phone app has been disabled in Settings.
Android's Phone app automatically receives incoming phone calls. You can use the PhoneStateListener class to monitor the phone's ringing state and show the incoming phone number.
Tip: You can also use a broadcast receiver in your app to detect an incoming call or SMS message. Broadcast receivers are described in Broadcast Receivers in the Android Developer Fundamentals Course.
The difference between dialing and calling
You use an implicit intent to launch the Phone app from your app. You can do this in two ways:
- Use an implicit Intent and
ACTION_DIALto launch the Phone app and display the phone number in the dialer.- This is the simplest way, with no need to request permission from the user (the Phone app asks for user permission if needed).
- The user can change the phone number before dialing the call.
- The user navigates back to your app using the Back button after the call is completed.
- Use an implicit Intent and
ACTION_CALLto make the phone call directly from within your app.- This action keeps the user within your app, without having to navigate back from the Phone app.
- Your code must ask the user for permission before making the call if the user hasn't already granted permission. Just as your app needs the user's permission to access the contacts or use the built-in camera, it needs the user's permission to directly use the phone.
- Your app can monitor the state of the phone call.
Formatting a phone number
To use an intent to launch the Phone app with a phone number to dial, your app needs to prepare a Uniform Resource Identifier (URI) for the phone number. The URI is a string prefixed by "tel:", for example, tel:14155551212 for a U.S. number (use the complete number as you would enter it on a phone keypad). You can hard-code a phone number inside your app, or provide an EditText field where the user can enter a phone number.
The PhoneNumberUtils class provides utility methods for normalizing and formatting phone number strings. For example, to remove extraneous characters such as dashes and parentheses, use the normalizeNumber() method, which removes characters other than digits from a phone number string. For example, the statement below normalizes a phone number entered into an EditText view named editText:
String normalizedPhoneNumber =
             PhoneNumberUtils.normalizeNumber(editText.getText().toString());
Use the formatNumber() method to format a phone number string for a specific country if the given number doesn't include a country code. You can use Locale.getDefault().getCountry() to get the current country setting, or use the ISO 3166-1 two-letter country code to specify a country to use:
String formattedNumber = PhoneNumberUtils.formatNumber(normalizedPhoneNumber,
                    Locale.getDefault().getCountry());
Using an intent with the phone number to dial
To use an intent to launch the Phone app, use a button to let the user start the call. When the user taps the button, its click handler initiates the call. For example, a simple layout could provide an ImageButton like the phone icon in the figure below.
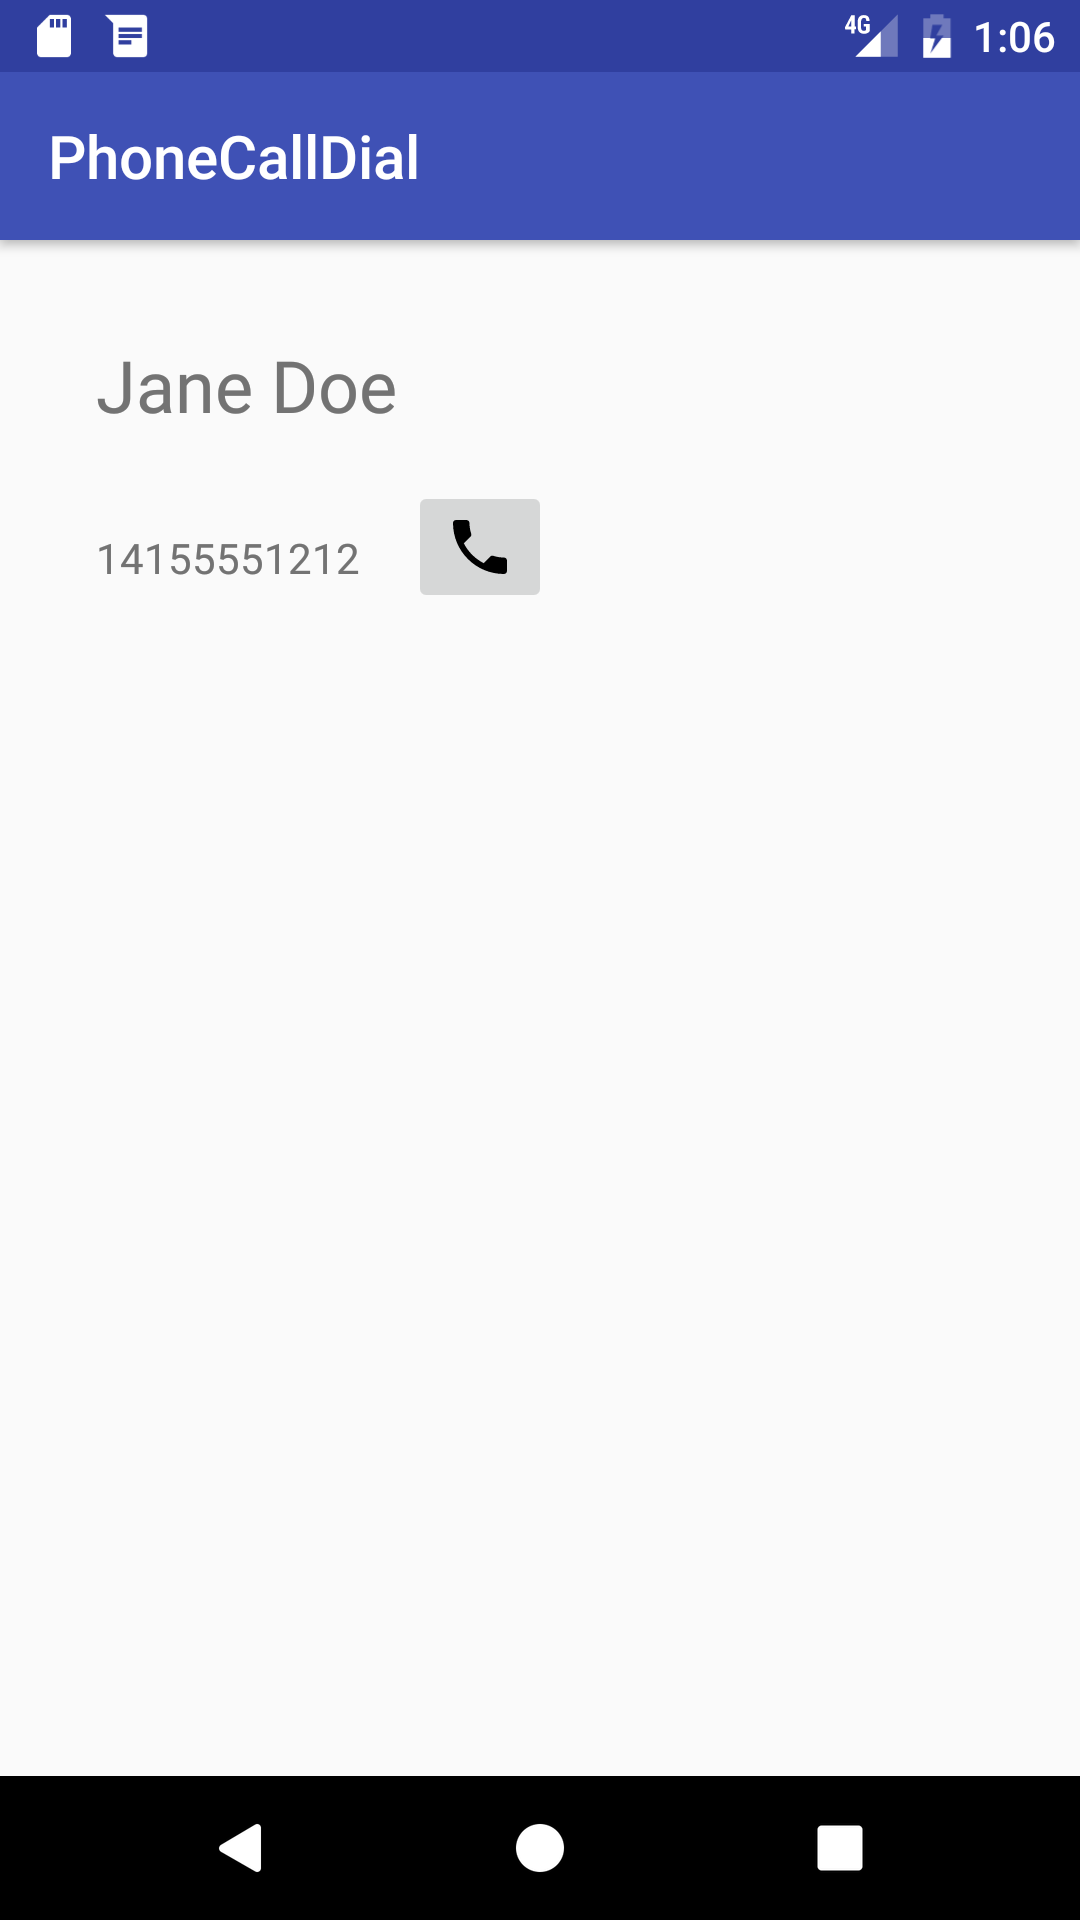
The Phone app opens with the number to be dialed. The user can change the number and initiate the call. The Phone app then makes the call.
<ImageButton
    android:id="@+id/phone_icon"
    ...
    android:onClick="dialNumber"/>
In the dialNumber() method, use an implicit intent with the intent action ACTION_DIAL to pass the phone number to the Phone app as a URI.
public void dialNumber() {
    TextView textView = (TextView) findViewById(R.id.number_to_call);
    // Use format with "tel:" and phone number to create phoneNumber.
    String phoneNumber = String.format("tel: %s",
                                       textView.getText().toString());
    // Create the intent.
    Intent dialIntent = new Intent(Intent.ACTION_DIAL);
    // Set the data for the intent as the phone number.
    dialIntent.setData(Uri.parse(phoneNumber));
    // If package resolves to an app, send intent.
    if (dialIntent.resolveActivity(getPackageManager()) != null) {
        startActivity(dialIntent);
    } else {
        Log.e(TAG, "Can't resolve app for ACTION_DIAL Intent.");
    }
}
In the above example, the code does the following:
- Gets the text of the phone number from
textViewwithgetText()and uses it withString.formatto include thetel:prefix (for exampletel:14155551212):... String phoneNumber = String.format("tel: %s", textView.getText().toString()); ... - Creates an implicit intent with the intent action
ACTION_DIAL, and sets the phone number as the data for the intent using setData():… Intent intent = new Intent(Intent.ACTION_DIAL); // Set the data for the intent as the phone number. intent.setData(Uri.parse(phoneNumber)); ... Checks if the implicit intent resolves to an app that is installed on the device.
If it does, the code sends the intent with
startActivity(), and the system launches the Phone app, as shown in the figure below.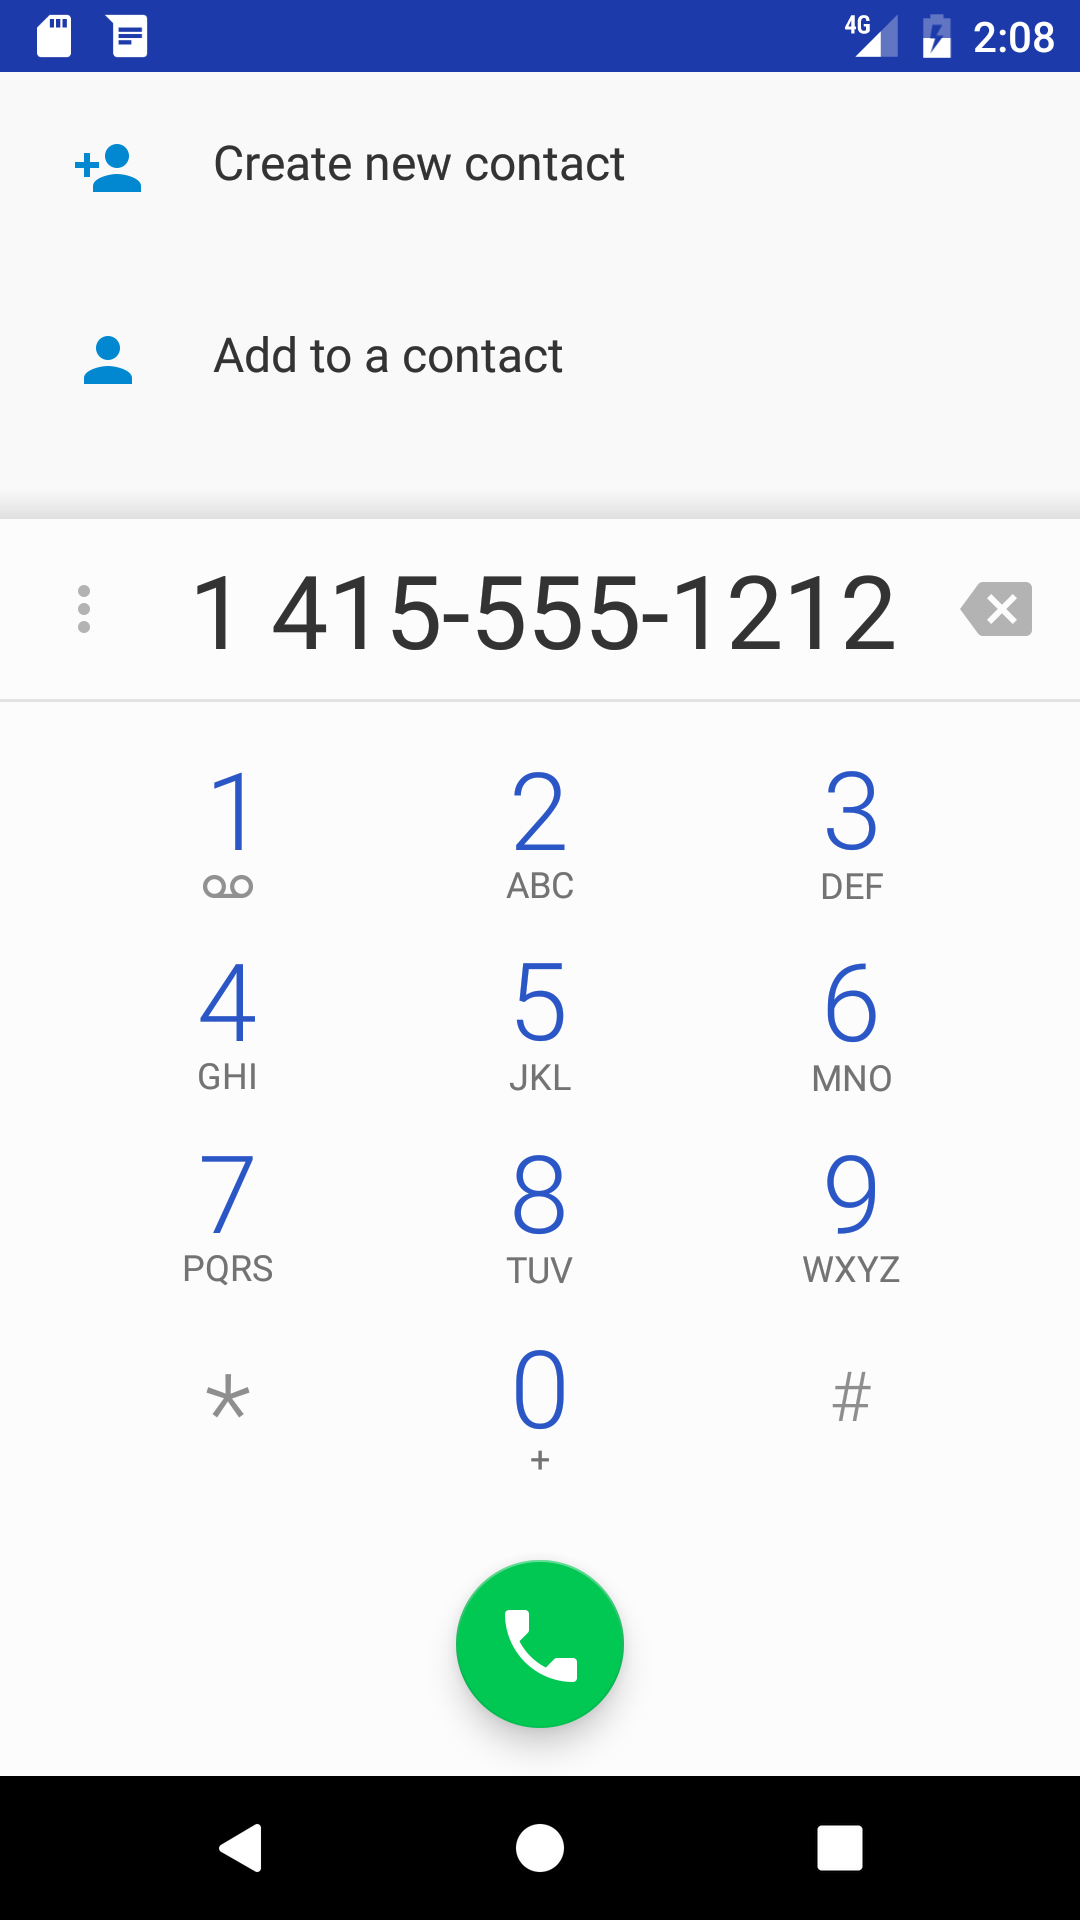
If it does not, an error is logged.
If there are no apps on the device that can receive the implicit intent, your app will crash when it calls
startActivity(). To first verify that an app exists to receive the intent, call resolveActivity() on your Intent object with getPackageManager() to get a PackageManager instance for finding package information. TheresolveActivity()method determines the best action to perform for a given intent. If the result is non-null, there is at least one app that can handle the intent and it's safe to callstartActivity().… if (intent.resolveActivity(getPackageManager()) != null) { startActivity(intent); } else { Log.e(TAG, "Can't resolve app for ACTION_DIAL Intent."); } ...
This example uses a hard-coded phone number, which is a useful technique for providing a support hotline number, or the selected phone number for a contact. In the next example, users can enter their own numbers to make calls.
Making a call from within your app
To make a phone call directly from your app, do the following:
- Add permissions that enable making a call and reading the phone activity.
- Check to see if telephony is enabled; if not, disable the phone feature.
- Check to see if the user continues to grant permission, or request permission if needed.
- Extend PhoneStateListener, and register the listener using the TelephonyManager class.
- Use an implicit intent with
ACTION_CALLto make the phone call.
Adding permissions to the manifest
Access to telephony information is permission-protected. In order to make a call, your app needs the CALL_PHONE permission. In addition, in order to monitor the phone state, your app needs the READ_PHONE_STATE permission. Both must be declared in the apps's AndroidManifest.xml file.
Add the following to your app's AndroidManifest.xml file after the first line (with the package definition) and before the <application> section:
...
<uses-permission android:name="android.permission.CALL_PHONE" />
<uses-permission android:name="android.permission.READ_PHONE_STATE" />

<application
...
Checking for TelephonyManager
Not all devices are enabled to use TelephonyManager. To check to see if telephony is enabled, follow these steps:
- Retrieve a TelephonyManager using getSystemService() with the string constant TELEPHONY_SERVICE in the onCreate() method of the activity:
@Override
protected void onCreate(Bundle savedInstanceState) {
   ...
   // Create a telephony manager.
   mTelephonyManager = (TelephonyManager)
                              getSystemService(TELEPHONY_SERVICE);
   ...
}
Create a method to ensure that
mTelephonyManageris not null, and that the SIM state is ready:private boolean isTelephonyEnabled() { if (mTelephonyManager != null) { if (mTelephonyManager.getSimState() == TelephonyManager.SIM_STATE_READY) { return true; } } return false; }The
getSimState()method returns a constant indicating the state of the SIM card.The above
returnstatement first checks iftelephonyManageris notnull, and if it is not, it returnstrueif the state of the SIM is "ready".- Call the above method in the
onCreate()method of your activity. If telephony is not enabled, your code should disable the feature. The example below displays a toast message, logs a debug message, and disables the call button, effectively disabling the phone feature:... if (isTelephonyEnabled()) { Log.d(TAG, getString(R.string.telephony_enabled)); // Todo: Register the PhoneStateListener. ... // Todo: Check for permission here. ... } else { Toast.makeText(this, R.string.telephony_not_enabled, Toast.LENGTH_LONG).show(); Log.d(TAG, getString(R.string.telephony_not_enabled)); // Disable the call button. disableCallButton(); } ...
Checking and requesting user permission
Beginning in Android 6.0 (API level 23), users grant permissions to apps while the app is running, not when they install the app. This approach streamlines the app install process, since the user does not need to grant permissions when they install or update the app. It also gives the user more control over the app's functionality. However, your app must check for permission every time it does something that requires permission (such as making a phone call). If the user has used the Settings app to turn off Phone permissions for the app, your app can display a dialog to request permission.
Tip: For a complete description of the request permission process, see Requesting Permissions at Run Time.
Follow these steps to check for and request user permission to make phone calls:
At the top of the activity that makes a phone call, and below the activity's class definition, define a constant variable to hold the request code, and set it to
1:private static final int MY_PERMISSIONS_REQUEST_CALL_PHONE = 1;Why the integer 1? Each permission request needs three parameters: the
context, a string array of permissions, and an integerrequestCode. TherequestCodeis an integer attached to the request, and it can be any integer that suits your use case. When a result returns in the activity, it contains this code and uses it to differentiate multiple permission results from each other.- In the activity that makes a phone call, create a private method
checkForPhonePermission()that returnsvoid.private void checkForPhonePermission() { if (ActivityCompat.checkSelfPermission(this, Manifest.permission.CALL_PHONE) != PackageManager.PERMISSION_GRANTED) { // Permission not yet granted. Use requestPermissions(). Log.d(TAG, getString(R.string.permission_not_granted)); ActivityCompat.requestPermissions(this, new String[]{Manifest.permission.CALL_PHONE}, MY_PERMISSIONS_REQUEST_CALL_PHONE); } else { // Permission already granted. } - In the activity's
onCreate()method, call the method to perform the telephony check:... if (isTelephonyEnabled()) { // Check for phone permission. checkForPhonePermission(); // Todo: Register the PhoneStateListener. } else { ...
Note the following about the checkForPhonePermission() method:
- The code uses
checkSelfPermission()to determine whether your app has been granted a particular permission by the user. - If permission has not been granted, the code uses the
requestPermissions()method to display a standard dialog for the user to grant permission. - The
requestPermissions()method needs three parameters: the context, a string array of permissions, and the predefined integerrequestCode. - When your app calls
requestPermissions(), the system shows a standard permission dialog to the user, as shown in the figure below. Your app can't configure or alter the dialog.

Tip: If you want to provide any information or explanation to the user, you must do that before you call requestPermissions(), as described in Explain why the app needs permissions.
When the user responds to the request permission dialog, the system invokes your app's onRequestPermissionsResult() method, passing it the user response. Override that method to find out whether the permission was granted:
@Override
public void onRequestPermissionsResult(int requestCode,
                    String permissions[], int[] grantResults) {
    switch (requestCode) {
        case MY_PERMISSIONS_REQUEST_CALL_PHONE: {
            if (permissions[0].equalsIgnoreCase
                        (Manifest.permission.CALL_PHONE)
                        && grantResults[0] ==
                        PackageManager.PERMISSION_GRANTED) {
                // Permission was granted.
            } else {
                // Permission denied. Stop the app.
                Log.d(TAG, getString(R.string.failure_permission));
                Toast.makeText(this,
                            getString(R.string.failure_permission),
                            Toast.LENGTH_SHORT).show();
                // Disable the call button
                disableCallButton();
            }
        }
    }
}
The above code snippet shows a switch statement based on the value of requestCode, with one case to check if the permission is the one you defined as MY_PERMISSIONS_REQUEST_CALL_PHONE.
Tip: It helps to use a switch statement so that you can add more requests to the app.
The user's response to the request dialog is returned in the permissions array (index 0 if only one permission is requested in the dialog). Compare this to the corresponding grant result, which is either PERMISSION_GRANTED or PERMISSION_DENIED.
If the user denies a permission request, your app should take appropriate action. For example, your app might disable the functionality that depends on this permission (such as the call button) and show a dialog explaining why it could not perform it.
Extending and registering PhoneStateListener
PhoneStateListener monitors changes in specific telephony states such as ringing, off-hook, and idle. To use PhoneStateListener:
- Implement a listener class that extends PhoneStateListener, and override its onCallStateChanged() method.
- In the onCallStateChanged() method, provide actions based on the phone state.
- Register the listener using the TelephonyManager class, which provides access to information about the telephony services on the device.
Implementing a listener
Create a private class in your activity that extends PhoneStateListener:
private class MyPhoneCallListener extends PhoneStateListener {
    ...
}
Within this class, implement the onCallStateChanged() method of PhoneStateListener to take actions based on the phone state. The code below uses a switch statement with constants of the TelephonyManager class to determine which of three states the phone is in: CALL_STATE_RINGING, CALL_STATE_OFFHOOK, and CALL_STATE_IDLE:
@Override
public void onCallStateChanged(int state, String incomingNumber) {
    switch (state) {
        case TelephonyManager.CALL_STATE_RINGING:
            // Incoming call is ringing.
            break;
        case TelephonyManager.CALL_STATE_OFFHOOK:
            // Phone call is active -- off the hook.
            break;
        case TelephonyManager.CALL_STATE_IDLE:
            // Phone is idle before and after phone call.
            ...
            break;
        default:
            // Must be an error. Raise an exception or just log it.
            break;
    }
}
Provide actions for phone states
Add the actions you want to take based on the phone states. For example, your code can log a message for testing purposes, and display a toast to the user. The CALL_STATE_RINGING state includes the incoming phone number, which your code can show in a toast.
The phone is in the CALL_STATE_IDLE state until a call is started. The phone state changes to CALL_STATE_OFFHOOK in order to make the connection and stays in the state for the duration of the call. The phone state returns to the CALL_STATE_IDLE state after the call finishes or if the call is denied or not completed.
Your app resumes when the state changes back to the CALL_STATE_IDLE state.
Tip: An app running on Android versions prior to KitKat (version 19) doesn't resume when the phone state returns to CALL_STATE_IDLE from CALL_STATE_OFFHOOK at the end of a call. The code below sets the flag returningFromOffHook to true when the state is CALL_STATE_OFFHOOK, so that when the state is back to CALL_STATE_IDLE, you can use the flag to catch the end-of-call and restart the app's activity.
private class MyPhoneCallListener extends PhoneStateListener {
    private boolean returningFromOffHook = false;

    @Override
    public void onCallStateChanged(int state, String incomingNumber) {
        // Define a string for the message to use in a toast.
        String message = getString(R.string.phone_status);
        switch (state) {
            case TelephonyManager.CALL_STATE_RINGING:
                // Incoming call is ringing
                message = message +
                        getString(R.string.ringing) + incomingNumber;
                Toast.makeText(MainActivity.this, message,
                        Toast.LENGTH_SHORT).show();
                Log.i(TAG, message);
                break;
            case TelephonyManager.CALL_STATE_OFFHOOK:
                // Phone call is active -- off the hook
                message = message + getString(R.string.offhook);
                Toast.makeText(MainActivity.this, message,
                                    Toast.LENGTH_SHORT).show();
                Log.i(TAG, message);
                returningFromOffHook = true;
                break;
            case TelephonyManager.CALL_STATE_IDLE:
                // Phone is idle before and after phone call.
                // If running on version older than 19 (KitKat),
                // restart activity when phone call ends.
                message = message + getString(R.string.idle);
                Toast.makeText(MainActivity.this, message,
                                   Toast.LENGTH_SHORT).show();
                Log.i(TAG, message);
                if (returningFromOffHook) {
                    // No need to do anything if >= version K
                    if (Build.VERSION.SDK_INT < Build.VERSION_CODES.KITKAT) {
                        Log.i(TAG, getString(R.string.restarting_app));
                        // Restart the app.
                        Intent intent = getPackageManager()
                                    .getLaunchIntentForPackage(
                                    .getPackageName());
                        i.addFlags(Intent.FLAG_ACTIVITY_CLEAR_TOP);
                        startActivity(i);
                    }
                }
                break;
            default:
                message = message + "Phone off";
                Toast.makeText(MainActivity.this, message,
                                        Toast.LENGTH_SHORT).show();
                Log.i(TAG, message);
                break;
        }
    }
}
Registering your listener
Register the listener object using the TelephonyManager class:
- Use getSystemService() with
Context.TELEPHONY_SERVICE. - Use telephonyManager.listen() with the PhoneStateListener set to the
LISTEN_CALL_STATE.
A good place to do this is in the activity's onCreate() method right after checking for phone permission, which is after ensuring that telephony is enabled. Follow these steps:
- At the top of the activity, define a variable for the PhoneStateListener:
private MyPhoneCallListener mListener; - In the
onCreate()method, add the following code after checking for telephony and permission:... if (isTelephonyEnabled()) { ... checkForPhonePermission(); // Register the PhoneStateListener to monitor phone activity. mListener = new MyPhoneCallListener(); telephonyManager.listen(mListener, PhoneStateListener.LISTEN_CALL_STATE); } else { ... - You must also unregister the listener in the activity's onDestroy() method. This method is usually implemented to free resources like threads that are associated with an activity, so that a destroyed activity does not leave such things around while the rest of its application is still running. Override the
onDestroy()method by adding the following code:@Override protected void onDestroy() { super.onDestroy(); if (isTelephonyEnabled()) { telephonyManager.listen(mListener, PhoneStateListener.LISTEN_NONE); } }
Using an implicit intent to make the call
To launch the Phone app and start the call:
- Use a button in the layout with an
onClickmethod such ascallNumber(). - In the
callNumber()method, create an implicit intent with the intent actionACTION_CALL. - Set the phone number as the data for the intent with
setData().
The following is an sample callNumber() method:
public void callNumber(View view) {
    EditText editText = (EditText) findViewById(R.id.editText_main);
    // Use format with "tel:" and phone number to create phoneNumber.
    String phoneNumber = String.format("tel: %s",
                                         editText.getText().toString());
    // Create the intent.
    Intent callIntent = new Intent(Intent.ACTION_CALL);
    // Set the data for the intent as the phone number.
    callIntent.setData(Uri.parse(phoneNumber));
    // If package resolves to an app, check for phone permission,
    // and send intent.
    if (callIntent.resolveActivity(getPackageManager()) != null) {
        checkForPhonePermission();
        startActivity(callIntent);
    } else {
        Log.e(TAG, "Can't resolve app for ACTION_CALL Intent.");
    }
}
As in the previous example for passing a number for dialing, you use a string for the phone number with the tel: prefix.
If the implicit intent resolves to an installed app, use the checkForPhonePermission() method you created previously to check to see if the app still has permission to make the call. You must check for that permission every time you perform an operation that requires it, because the user is always free to revoke the permission. Even if the app used the phone a minute ago, it can't assume it still has that permission a minute later.
Using emulators to test phone call functionality
If you don't have cellular service on your device, or telephony is not enabled, you can test the app using two emulator instances—one emulator instance calls the other one.
- Launch an emulator directly from the AVD Manager by choosing Tools > Android > AVD Manager.
Double-click a predefined device. Note the number that appears in the emulator's window title on the far right, as shown in the figure below as #1 (5556). This is the port number of the emulator instance.
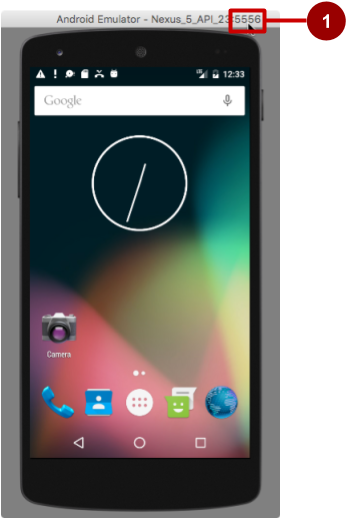
- Open the Android Studio project for the phone-calling app.
- Run the phone-calling app, but choose another emulator from the list—not the one that is already running.
- In the phone-calling app, instead of a real phone number, enter the port number (as in 5556), and click the call button. The emulator shows the phone call starting up, as shown in the figure below.
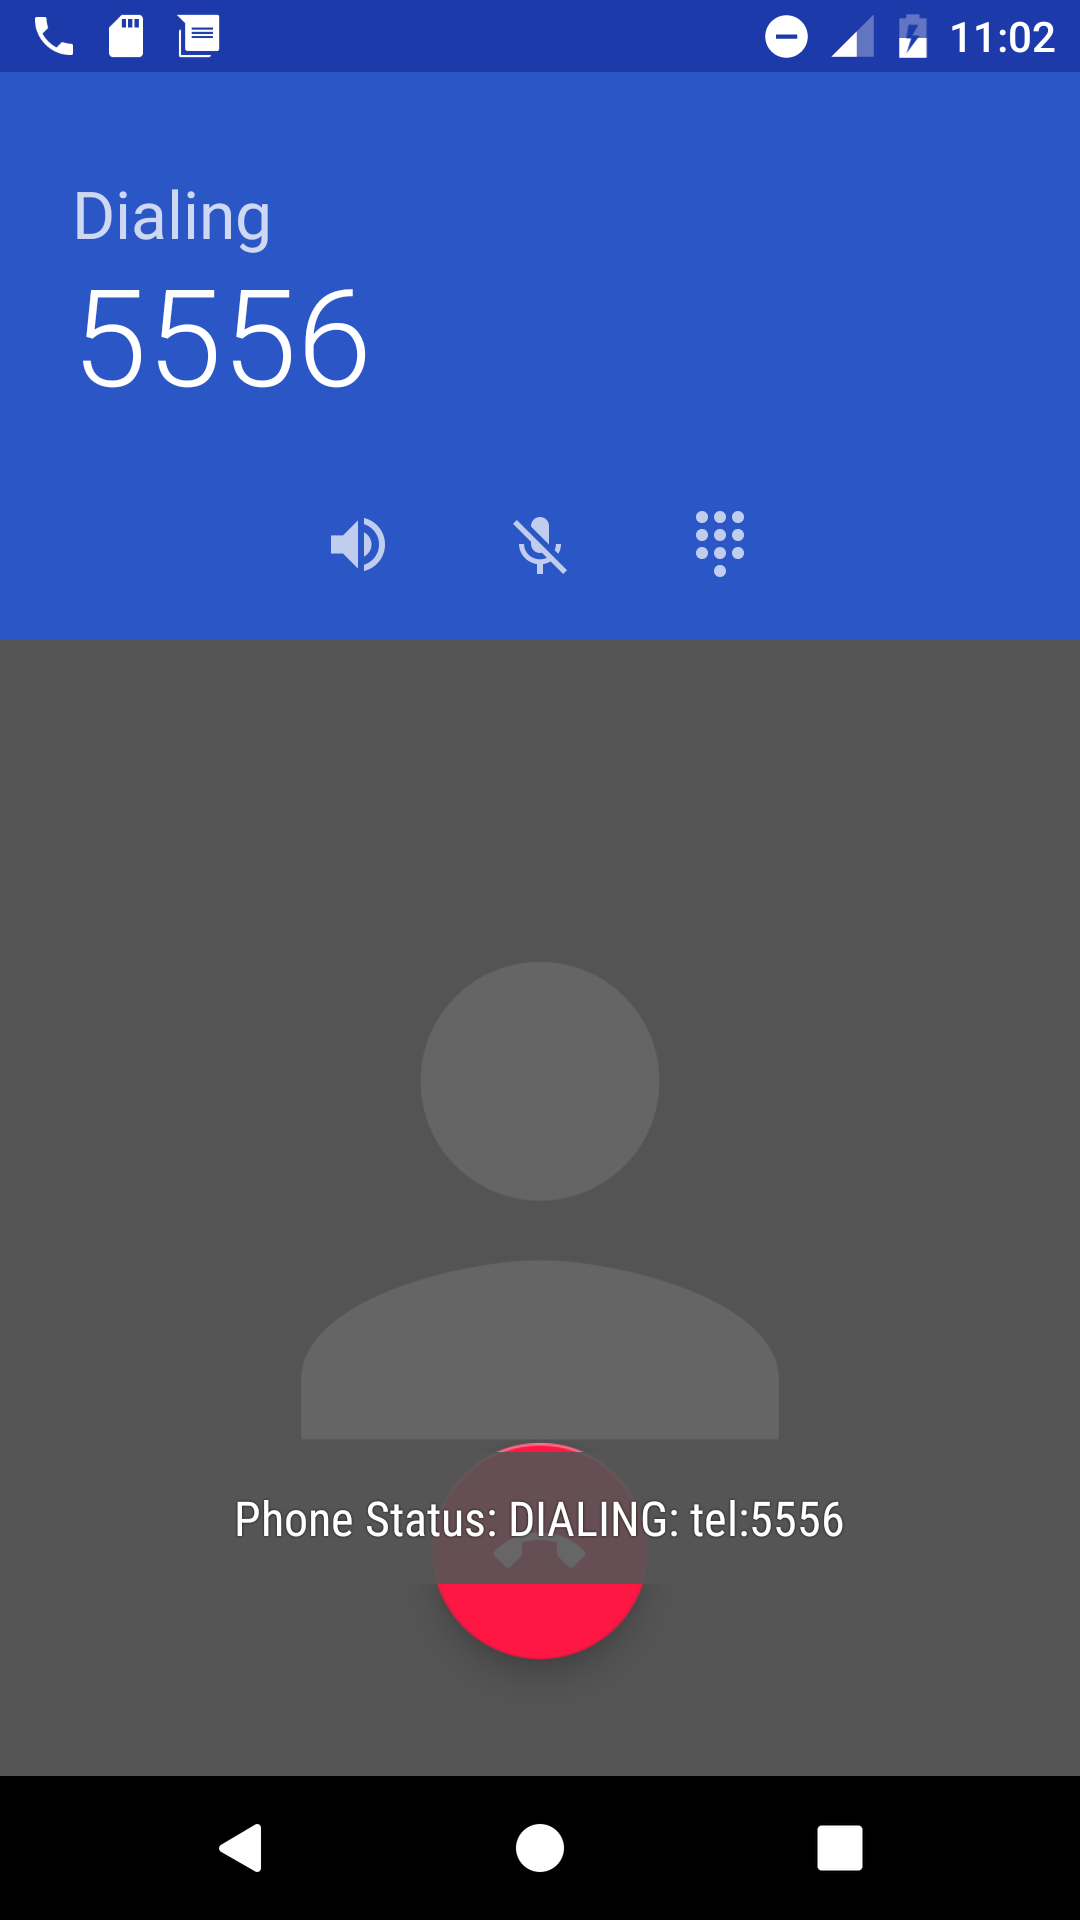 The other emulator instance should now be receiving the call, as shown in the figure below:
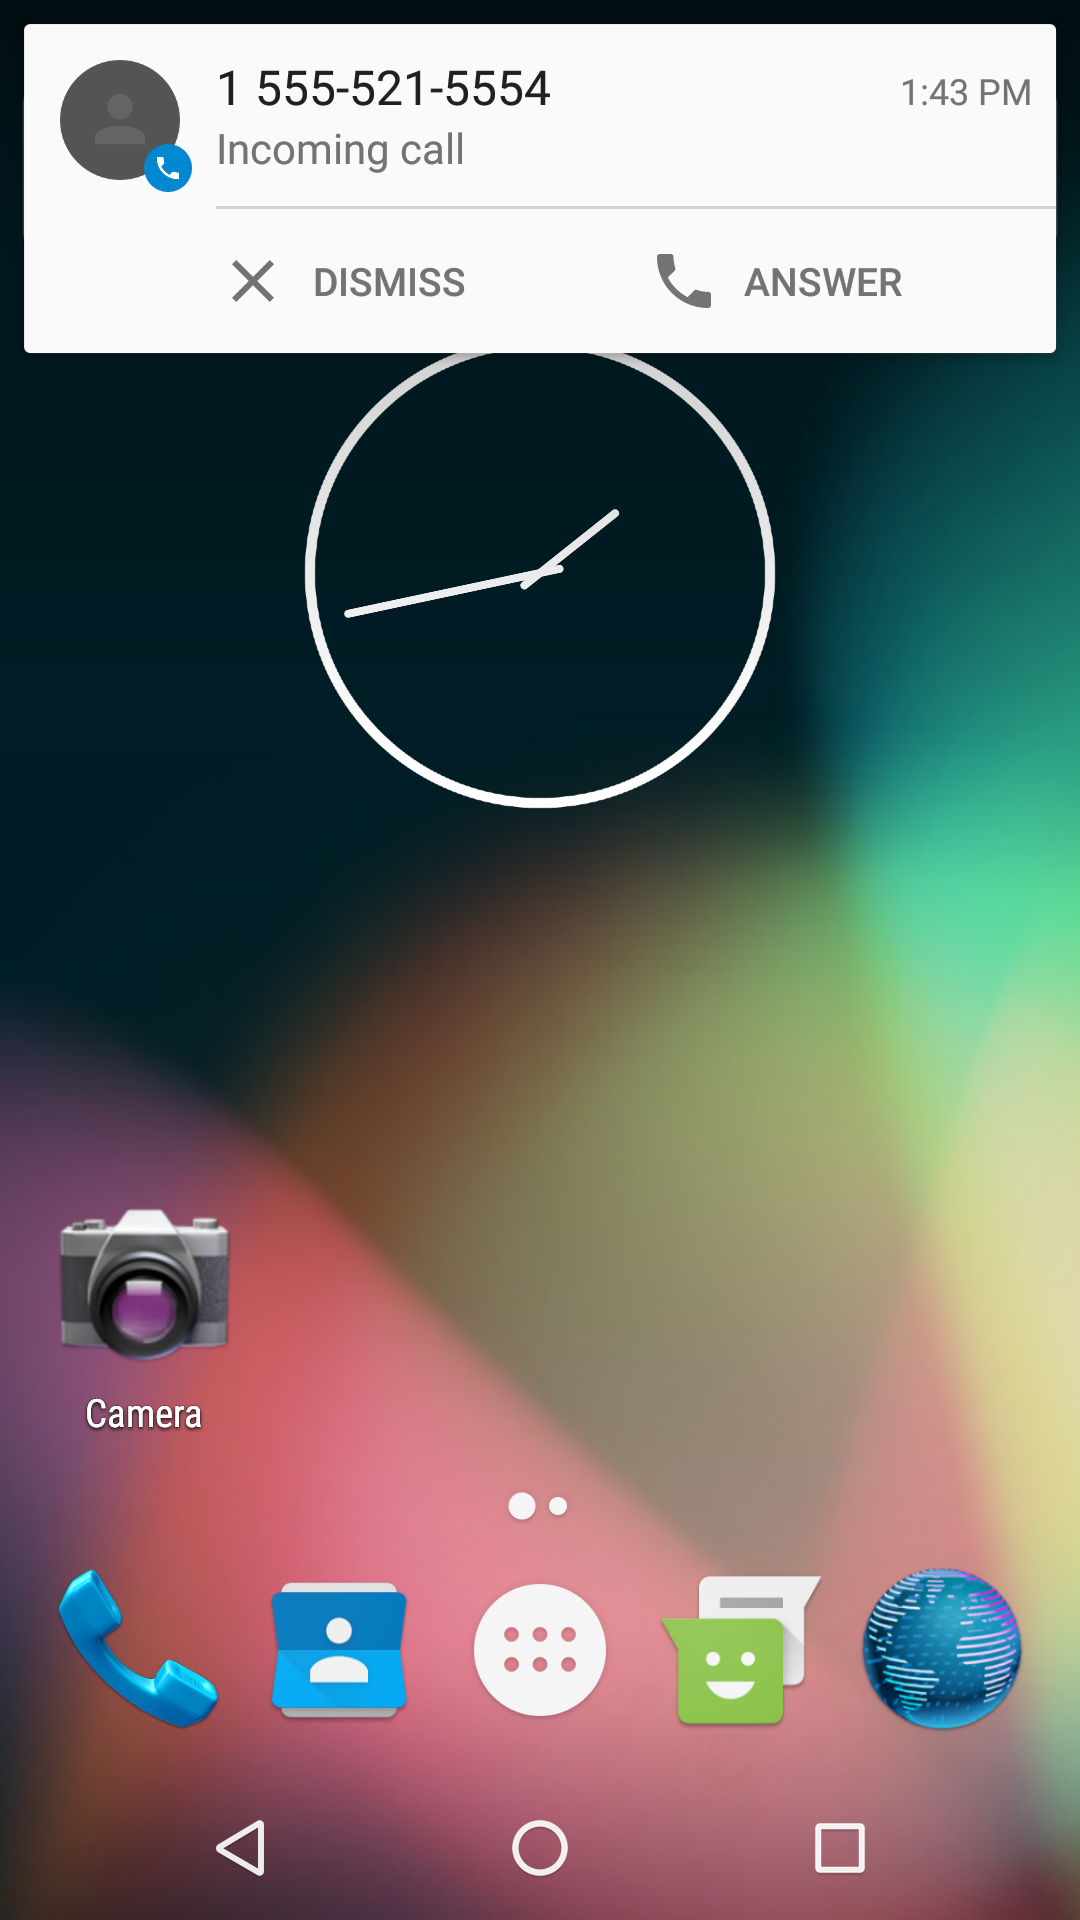
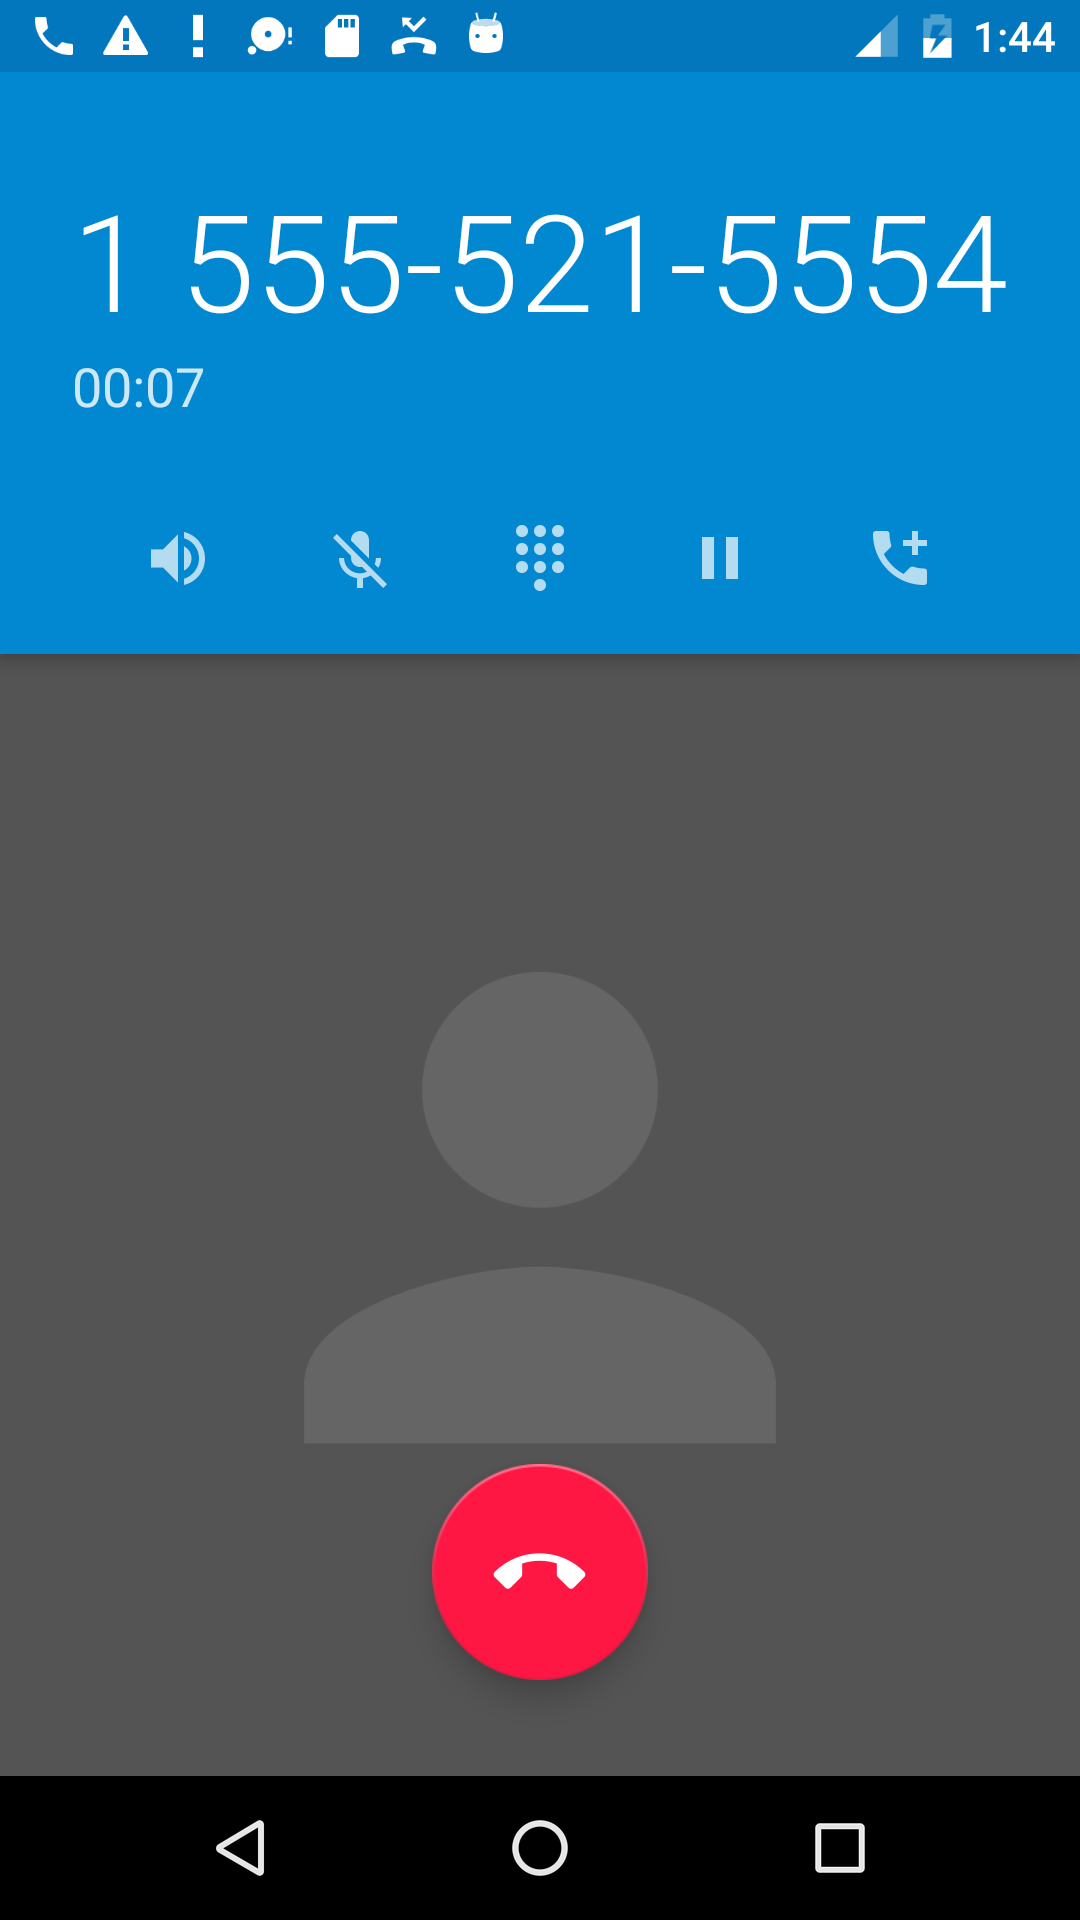
- Click Answer or Dismiss on the emulator receiving the call,. After you click Answer, also click the red Hang-up button to end the call.
Related practical
Learn more
- Android Developer Reference:
- Stack Overflow:
- Other
- User (beginner) tutorial: How to Make Phone Calls with Android
- Developer Video: How to Make a Phone Call